 |
|
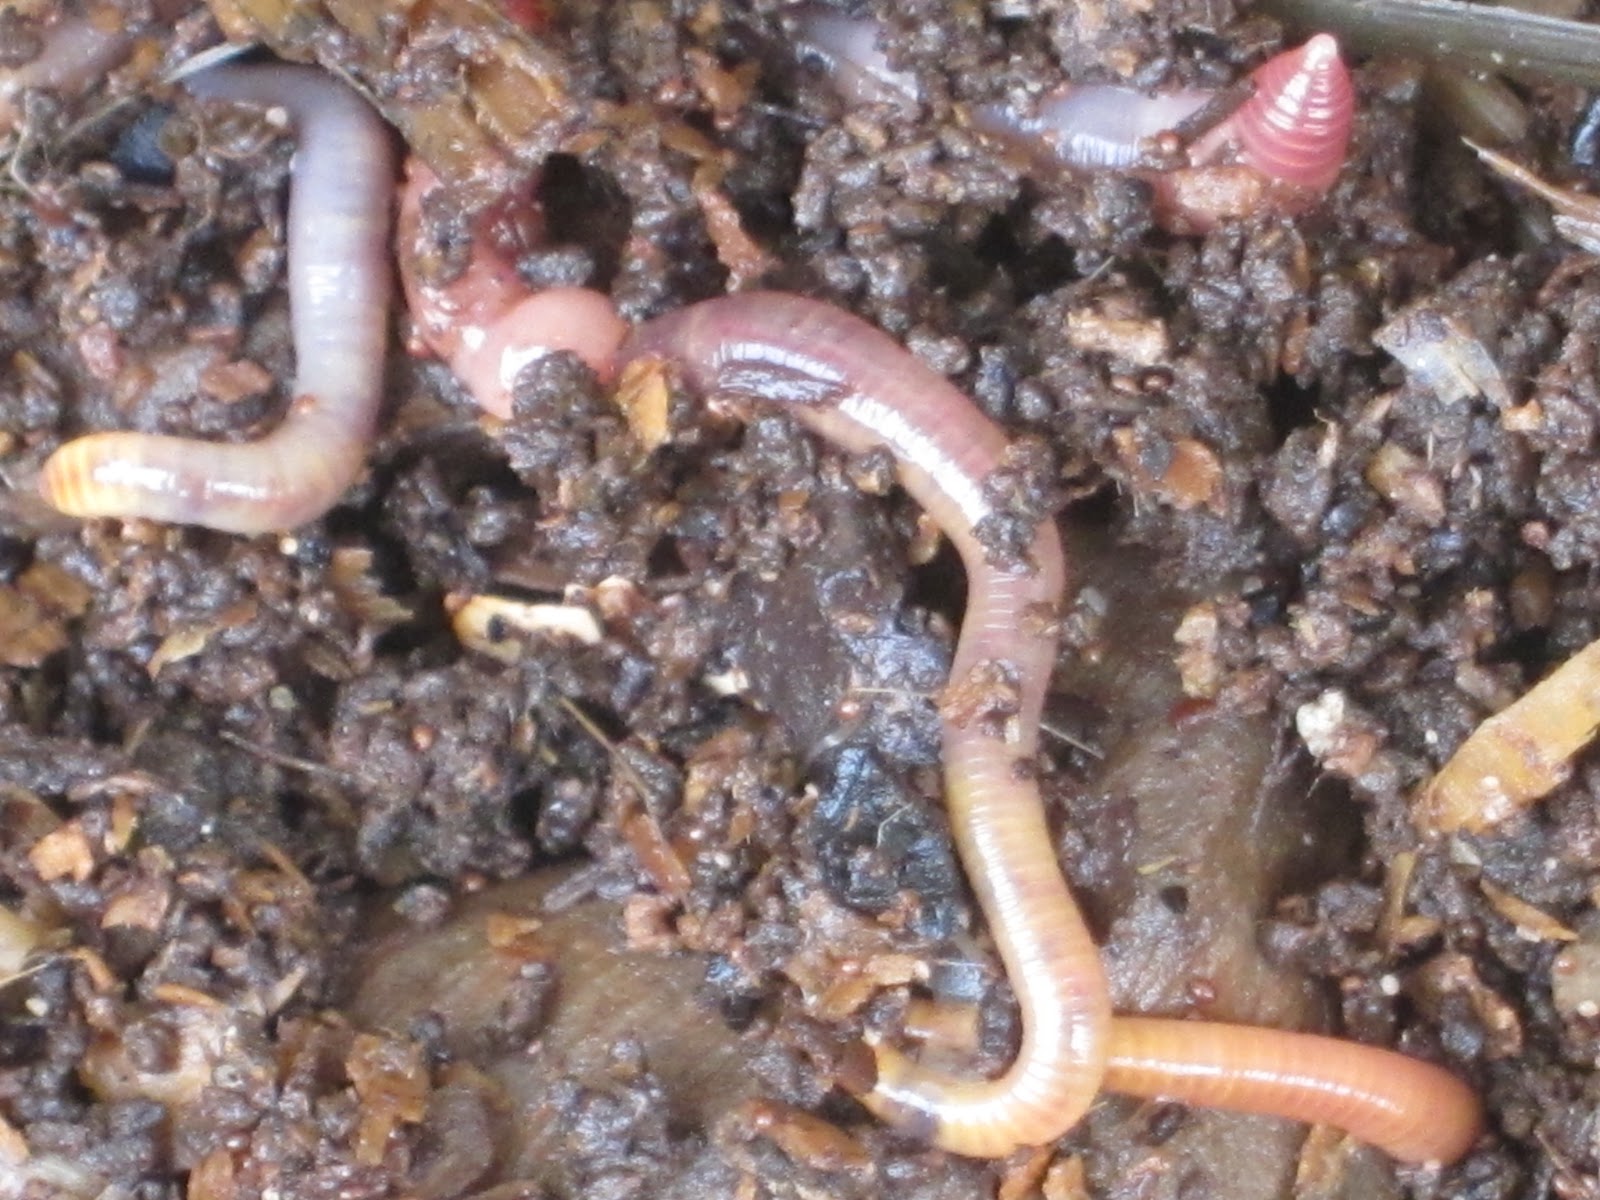
| These worms are fat and happy |
Some of you may remember that Earth Goddess Nancy Klehm taught a vermicomposting class at our house in October. Some of you reading this may have even attended!
That day, Nancy and the class foraged and gathered materials to fill a bin and worked together to chop, moisten and prep the materials. The materials included our own kitchen scraps, farmers market trimmings, cardboard and newspaper gathered from neighborhood recycling bins, chunks of our infamous prickly pear cactus, a “nitrogen contribution” from one of the more intrepid class members, some well aged humanure compost and some of the aged cat compost from our kitty litter compost barrel. (More on that later.) We didn’t have our final worm bin built at that time, so the materials were layered like a lasagne in a 50 gallon drum. When introduced the worms from our sad little kitchen bin into this pile of goodness, the worms thought they had landed in nirvana.
Since then, Erik has built a giant wooden bin for us following Nancy’s plans. It’s a simple thing, very like a toy chest. Nancy’s plans called for it to be 4 feet long, but Erik built the chest 5 feet long because he was working with 10 foot boards (less waste that way, you see). The result is a long pine box that looks disturbingly like a coffin! But that’s okay. Really, what better than a pine box full of worms staring us in the face to remind us all that we have to seize the day?
 |
| Why do we have a coffin on our back porch, you ask? |
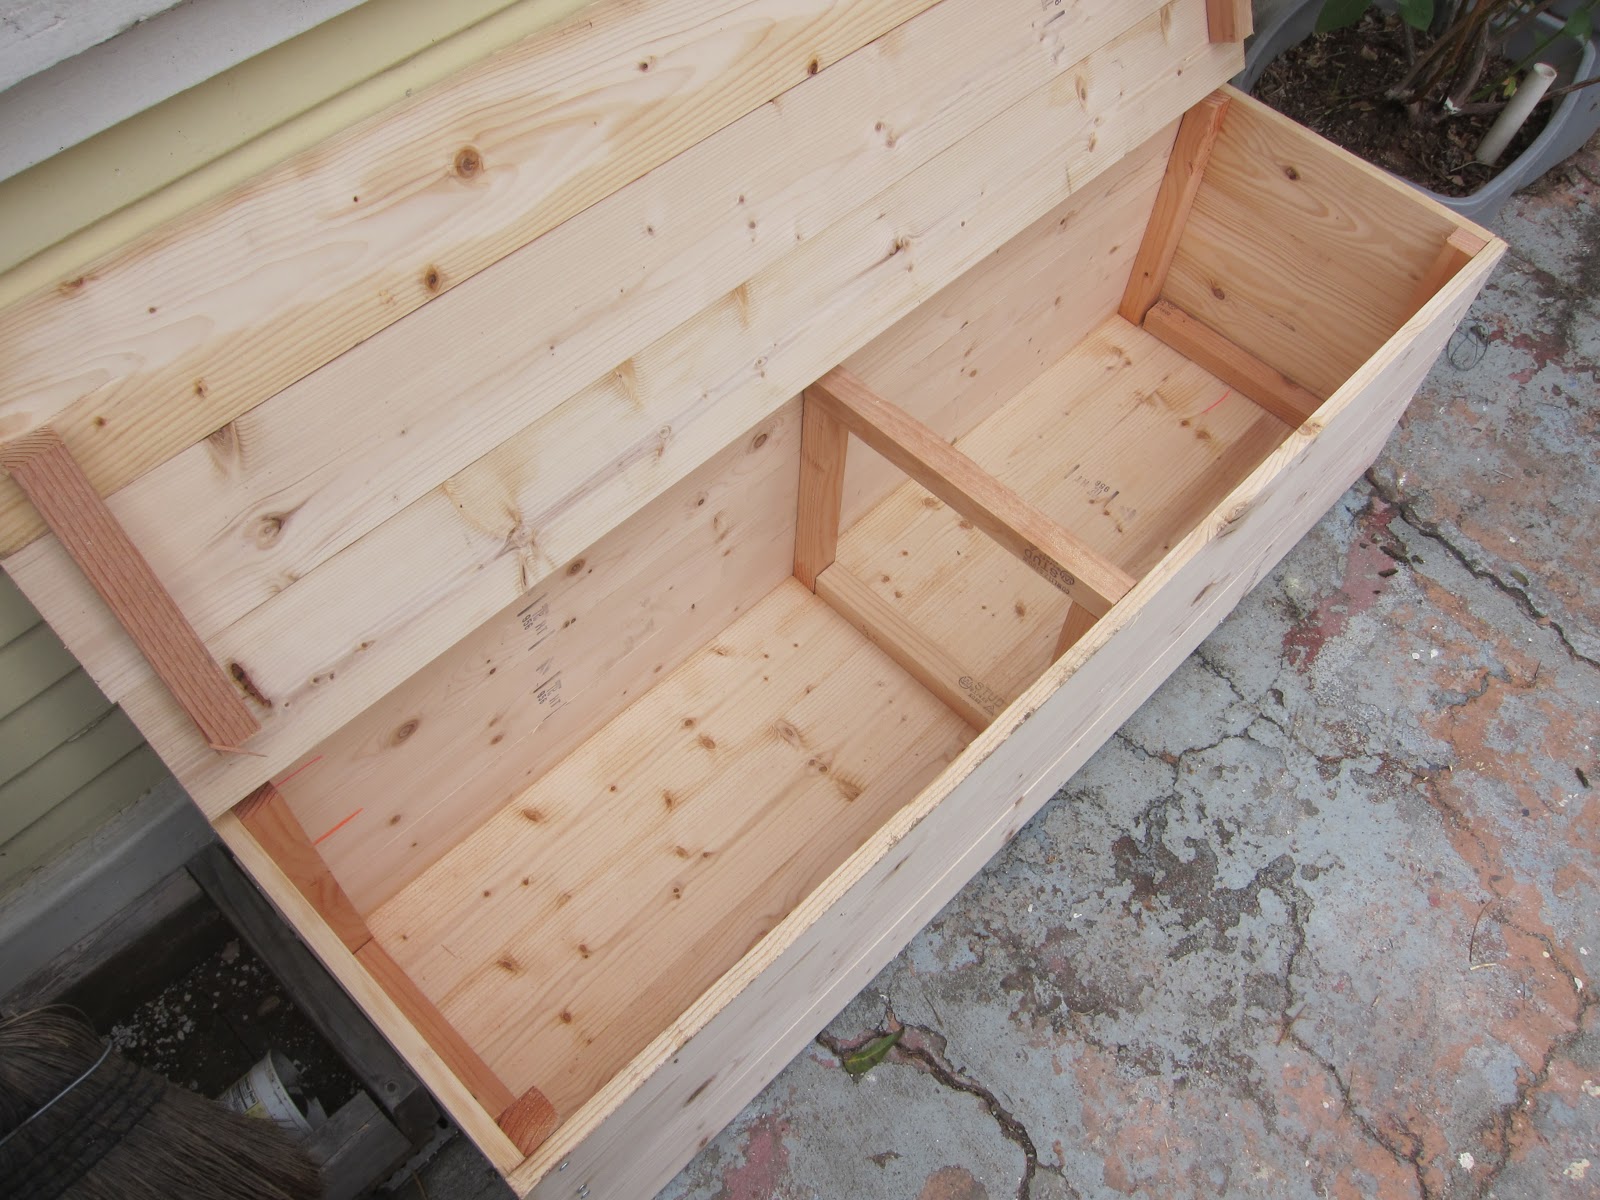 |
| The inside view, proving it is not a coffin. We’re going to decorate this somehow–which might help, or it might just look like we have a decorated coffin on our back porch. Right now the process is stalled because we are bickering over which pretentious Latin motto to paint on the side. |
I transferred all the contents into the coffin box. What was interesting about Nancy’s mix is that it is much more like an active compost pile than the traditional newspaper shreds + scraps that make up a typical worm bin. The materials had heated up while sitting. Heat isn’t good for worms–they like to occupy cool compost piles–but I figured in a box of that size they could find cool pockets and edges to hang out in until it cooled off. And that’s exactly what they did. There weren’t so many of them to begin with, and they were happy to hang out on the top layer until the rest cooled.
Since then, a wormy miracle has taken place. First, given the space and resources, they’ve started breeding like crazy. That’s to be expected. More interestingly, they’ve grown. The worms are getting super big and fat. I figure they’re like goldfish, adapting to fit their space. I think they really like the diversity of materials they’re living with, both in terms of habitat and nutrients.
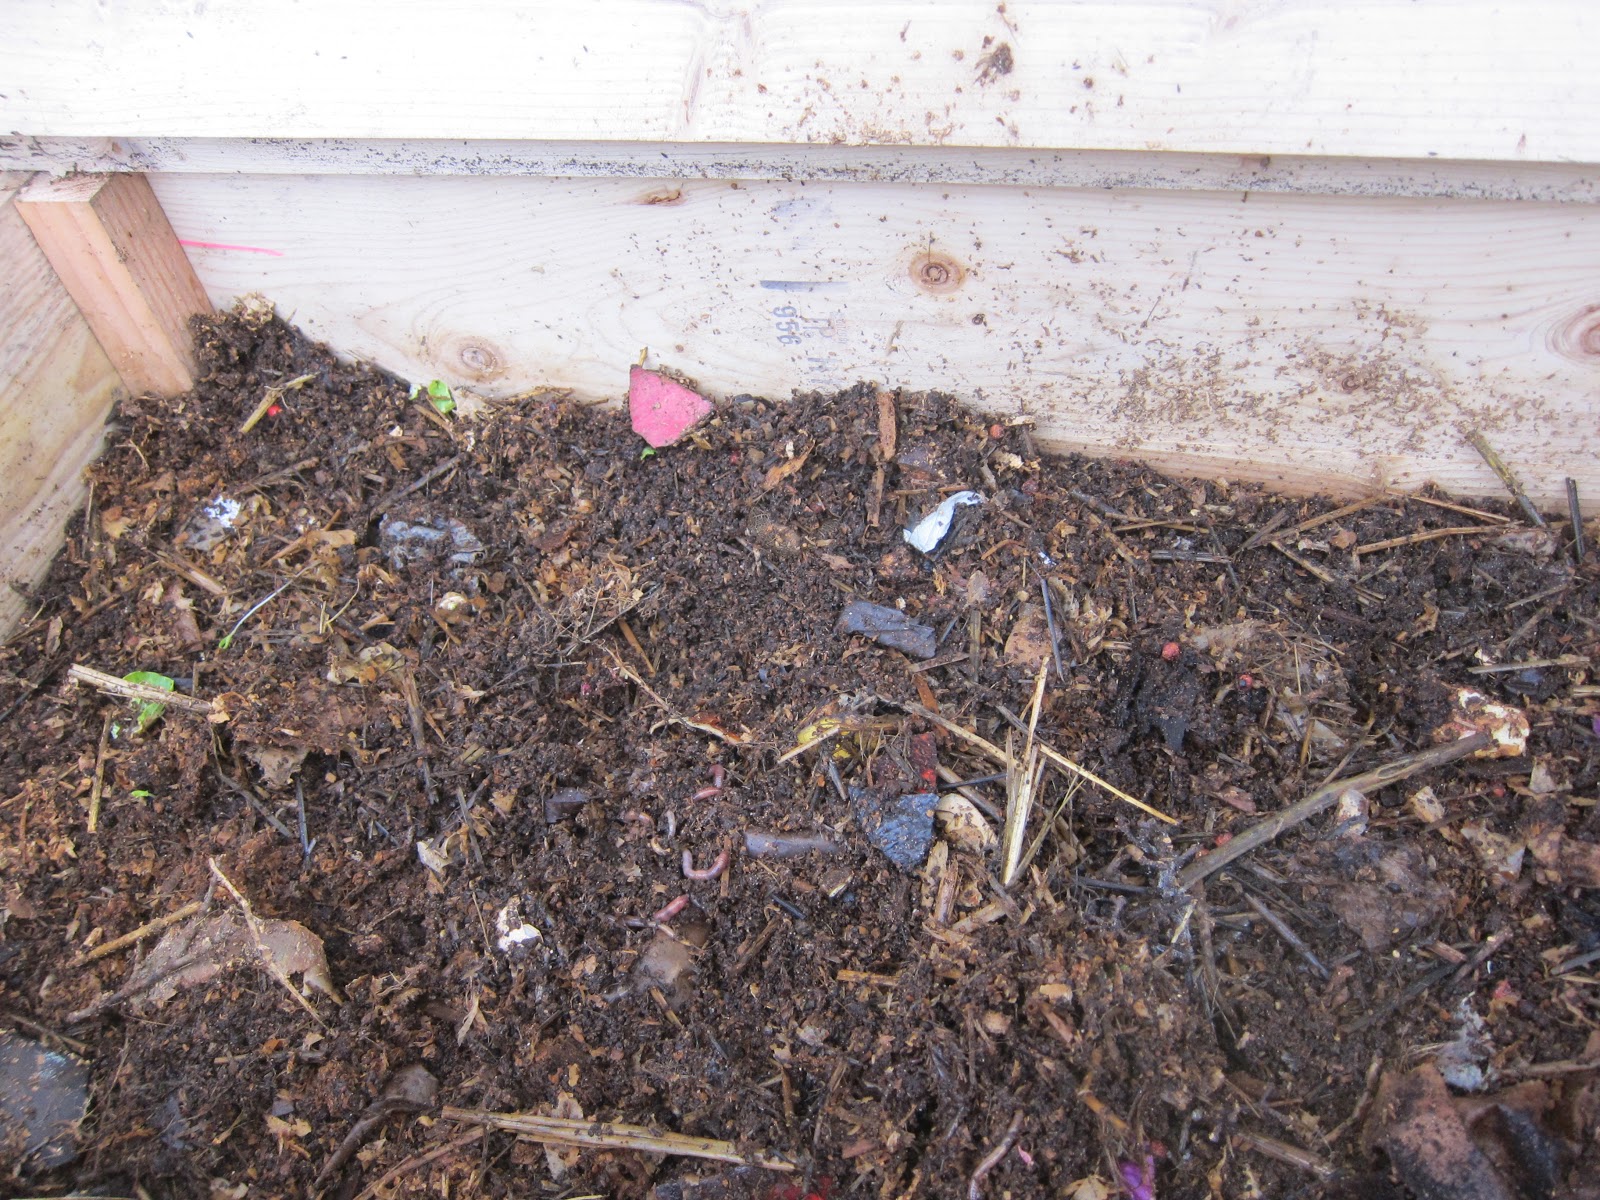 |
| The surface of the bin as of today. You’ll see it looks a lot like a compost pile, as opposed to a bunch of newspaper. |
For my part, I love, love, love having a huge worm bin because it can easily absorb all of our kitchen waste. I can take my entire one gallon scrap pail, dig a hole in the bin, and dump it all in. When we had the small worm bin–which was made of a plastic storage bin–I could only add a cup or two of scraps at a time. This made the bin more of a hobby than a convenience. What’s extra cool is that those huge scrap loads vanish really fast in the new bin, whereas scraps tended to linger in the small bin.
Here’s a morbid question for you all: Whenever I add new scraps and see the old ones broken down so quickly, I recall something about an old cemetery in France, I believe, which was known for breaking down bodies extra fast, due to the composition of the soil. Mr. Google isn’t helping me recover this lost information, but I believe the cemetery was nicknamed “the man eater” or the “bone eater” or something like that. Does anyone with similarly Gothic tendencies happen to know what I’m talking about?
On outdoor worms:
Outdoor worm bins do have to be protected from worm predators–lots of critters like to eat worms, even dogs–either by weighing down the lid or latching it somehow. For now, we’re just keeping a big chunk of broken concrete on top. (Uhh…do I hear banjo music?)
Extreme temperature fluctuations are a problem outdoors. Worms like the temperatures we humans prefer, essentially. If it’s broiling out and they can’t find cool ground, they’ll die. When their bin freezes, they’ll die. Freezing is not an issue for us, but Nancy, being from Chicago, is an authority on cold. She says what happens with outdoor bins there is that when the deep freeze comes, the adult worms will die off, but the eggs will overwinter, and the bin will rebuild itself in the spring. Obviously, if you want your worm bin to function year-round in a cold climate it will have to be kept in a basement or a mudroom or somewhere where the temperatures are a little more moderate.
On the flip side, the mass of a big bin helps insulate the worms from the heat. They can dive deep, or hang out on the shady side of the bin. But it helps quite a bit if you can give the worms some shade during the summer, either by moving the bin under a tree or setting up some kind of screen to block the worst of the sun.
Managing the waste stream:
Diverting all kitchen waste to the worm bin works well with our waste stream because of late, Erik has preferred to build his compost piles all at once–usually when we clear out our garden when the seasons change. The piecemeal additions of food scraps interferes with the timing of his compost harvest. See, if you build a pile all at once, you get finished compost much more quickly than if you add material a bit at a time. This is not to say that “bit at a time” piles are bad, they’re just slower. Now we have the best of both worlds.
Regarding the cat poop compost:
This should probably be a whole other post. But the short version is that I’ve been composting our cat litter in its own separate pile. This works pretty well, but with two indoor cats (aka pooping machines) the bin fills up fast. When we built the worm bin, Nancy had us harvest some of the older, more finished kitty litter compost from the bottom of the cat pile to mix into the worm pile as a base material, and I will continue to do this whenever our cat bin overfloweth. The ability to transfer some of the mature material to the worm bin will function as sort of a pressure release valve on our cat pile, allowing the whole system to work better.
Is this safe? I’m not going to say it is. I’m not going to recommend that any of you do this. When it comes to composting pet or human poo, we believe good composting technique, worms and time make all things well. But obviously if this is done badly, it could be quite dangerous. If you’re interested in extreme composting, as always, I recommend you visit Joe Jenkins’ site–he’s the author of The Humaure Handbook.
So from Erik, me and the worms: A huge and hearty thank you to Nancy and to all the class attendees who helped us make this wonderful bin!


